WHY A UNIFORM CANVAS IS IMPORTANT FOR POLISHED CONCRETE
Share this article:
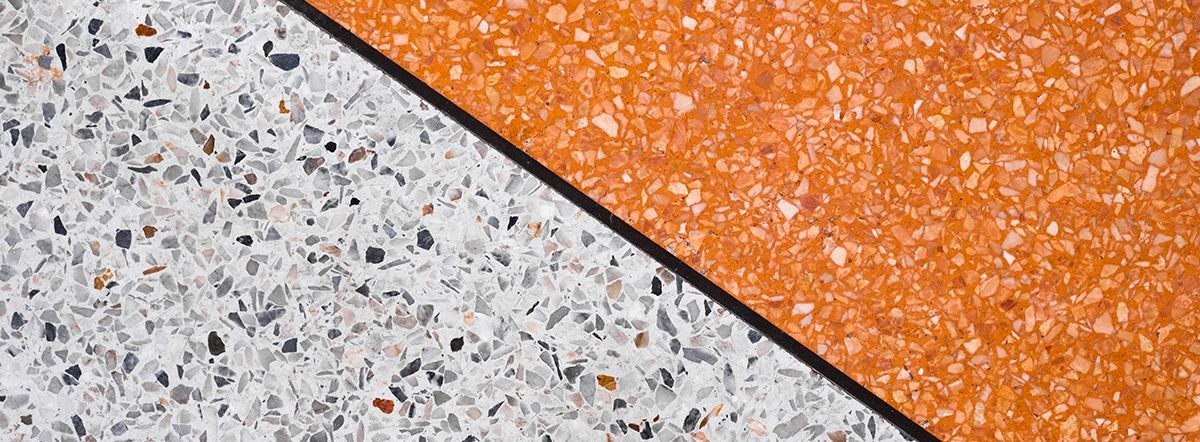
Polished concrete floors are attractive and eye-catching. Businesses with smooth, gorgeous flooring stand out in their respective industries. Few people realize, however, that the stunning appearance of a polished floor begins with the slab of concrete. With older and existing concrete floors, you don’t have the luxury of controlling how they were placed, so you polish whatever you are starting with. With new concrete floors, it is different in that you have the opportunity to control and craft the floor you start with well before polishing ever begins. In our industry, this is what we call creating a uniform canvas.
While concrete is imperfect, taking measures to prevent common defects during installation is important for certain aesthetic goals in your polished finish. The common assumption that polishing hides or eliminates concrete defects is a misconception. In fact, polishing an imperfect concrete canvas usually accentuates existing flaws.
The following content explores the process of creating as uniform a canvas as possible by eliminating four common imperfections that can occur when installing new concrete floors.
FOUR COMMON CANVAS DEFECTS
- Differential Aggregate Exposure
- Surface Finish Density Differences
- Saw Cutting
- Curing Discoloration or Blemishes
DIFFERENTIAL AGGREGATE EXPOSURE
When the concrete aggregate is exposed at differing depths, differential aggregate exposure occurs. A variety of reasons could affect this, from the process utilized to place the concrete to the chosen pouring method. The following guidelines aid in avoiding differential exposure when laying concrete for polished concrete projects:
Eliminate aggregate stacking. If possible, always place the concrete straight from the truck. When a pump hose is absolutely necessary, keep the hose in motion. Allowing it to rest in a single spot for too long during concrete discharge results in stacking.
Perform uniform consolidation. Don’t leave the vibrator in a single place for an extended period of time, as this visibly divorces the aggregate from the cement paste. In a project’s planning phase, ensure that the vibrators to be used are consistent in size, frequency, vibration time, etc.
Minimize or remove bump cutting. During finishing, bump cutting deposits paste from high spots to low spots, resulting in high spot aggregate being exposed first. Considering utilizing pan floats for flatness before polishing for even exposure.
Lessen walking on slab: Frequent stepping on the concrete brings excess paste to the surface, a visible defect seen during polishing. As a prevention tactic, use a strike-off screeding method that doesn’t require standing on young, malleable concrete.
SURFACE FINISH DENSITY DIFFERENCES
Differences in surface finish densities frequently occur, sometimes only noticeable after polishing. The following tips help eliminate these differences:
Machine and hand finish carefully. Both methods appear differently during polishing. Use a beveled form edge at pour edges and a machine finish over form edges. For concrete slabs poured against walls, utilize a walk-behind machine; employ a ride-on machine close to columns or construction joints.
Avoid burnished finishes. When burnishing is performed, the polished concrete surface will not be uniform.
Check for mortar. Before troweling the concrete, ensure that every troweling machine is free of residual mortar. Fallen mortar under the machine visibly scratches the canvas.
SAW CUTTING
During saw cutting, utilize an early-entry power saw to reduce out-of-joint cracking. Also, a vacuum must be attached to the saw for immediate saw cut residue removal. Residual residue will both discolor and scratch the concrete, ultimately ruining a final polished floor.
As the last layer of protection against scratching caused by remaining debris, adhere a Velcro fastener strip to the skid plate.
CURING
Wet curing your concrete slab is the most recommended method for polished concrete floors. The best covers for holding moisture are fashioned from a poly-backed cellulose material. To prevent discoloration from differential cure during the curing process, a broom or roller should be applied to smooth any wrinkles across the canvas. When curing blankets aren’t applied consistently, or wrinkles across the blanket exist, air exposure is inconsistent across the concrete. Thus, the concrete is allowed to breathe more in certain areas and discoloration occurs.
To further diminish the danger of discoloration, pour enough water below the cure blankets. After removing the cure blankets, clean the concrete canvas surface. Salts will arise from bleed channels and should be scrubbed while in their soluble state. Once hardened, the salts will begin to discolor the canvas.
WHY DOES A UNIFORM CANVAS MATTER?
Eliminating common concrete canvas imperfections is important, because initial blemishes may last forever. Polishing a concrete surface often accentuates flaws. Especially for Class A or Class B exposure, even minimal mistakes may never be removed.
ROYALE CONCRETE
If your project is still in the planning stages, consult your concrete floor finish professionals. Flooring experts will discuss the methods used for slab placement and how these might affect your goals for the final floor finish.
At Royale Concrete, we believe that it is important for you to understand every variable before ever placing your concrete. We provide consultation, technical documents, and expert advice to ensure that every trade is on the same page. Furthermore, we are passionate about your final floor finish. Expert consultation prior to concrete placement ensures that the canvas meets all of your goals. This eliminates frustrations with creating your final floor finish or limiting your options altogether.
Don’t worry if you have already placed your slab. We can still help! You have many, great options regardless of the condition of your floor. Dustin Bartz, from Estes Construction, wrote: “Royale Concrete was able to tackle a challenging project with their skilled team.” Whatever your commercial project, our professional team at Royale Concrete will complete it with excellence. Contact us today to discover every option possible for you!